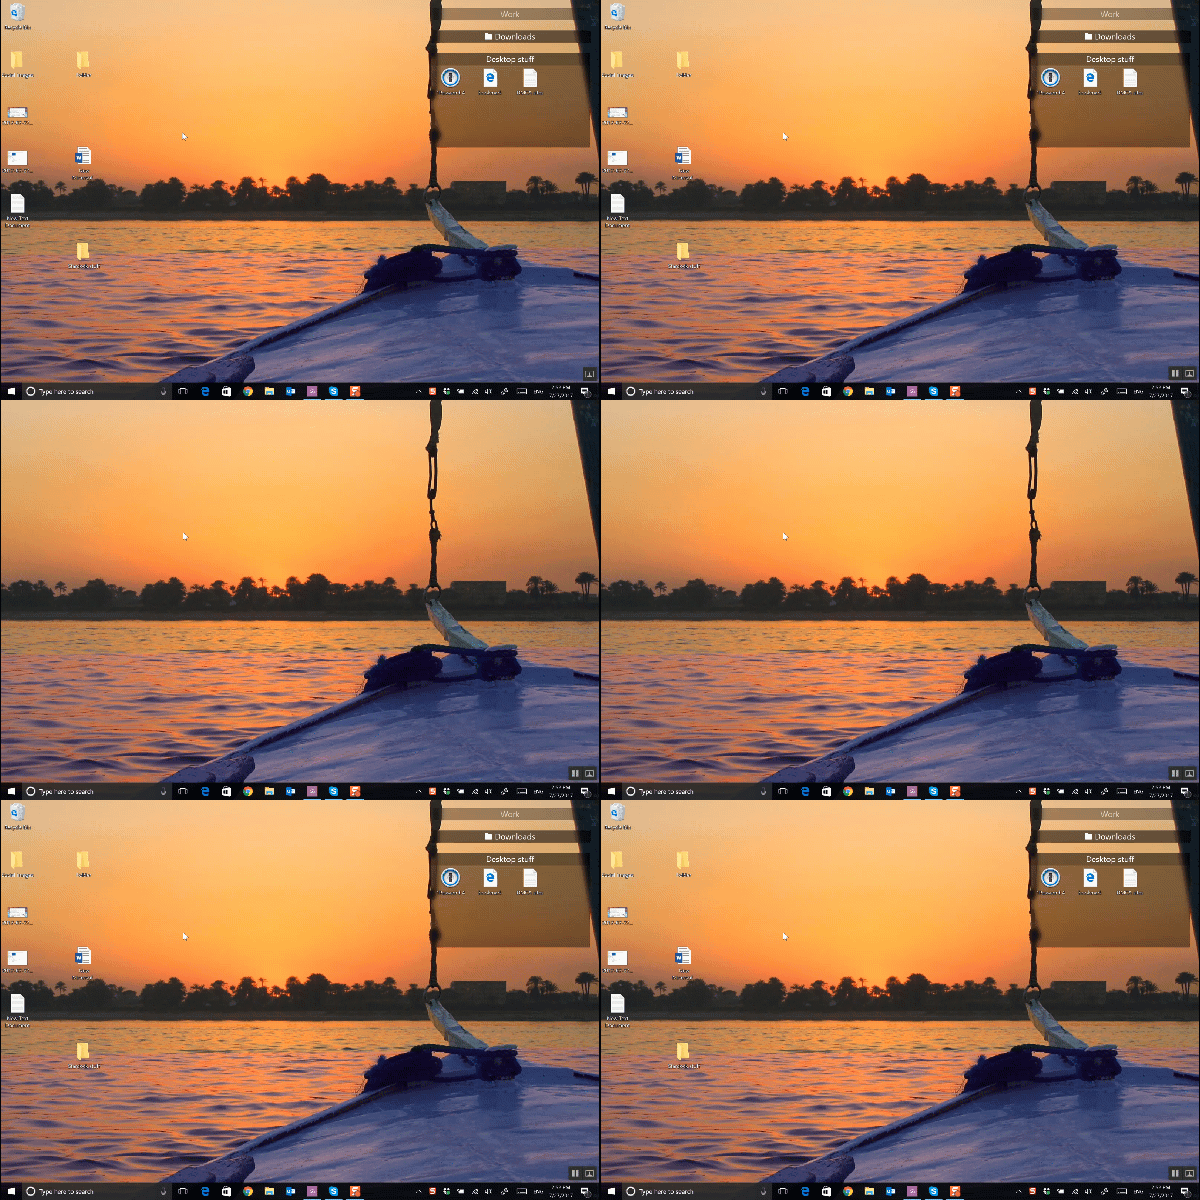
Fences organizes your Windows desktop, improves your workflow, and makes your important applications easy to find at a glance. These shaded areas on your desktop can be completely customized (color, size, transparency, roll up options, and more), but there's a lot more to this program than just that! Here are a few quick tips that will help you get the most out of Fences.
Tip #1 – Quick hide the desktop icons
If you ever need a blank desktop space for any reason, Fences makes this really easy to do! Double-click anywhere on your desktop to hide your fences and icons, leaving a blank desktop perfect for working. When you want them back just double-click again to make them re-appear.

Tip #2 – Exclude certain icons from quick-hide
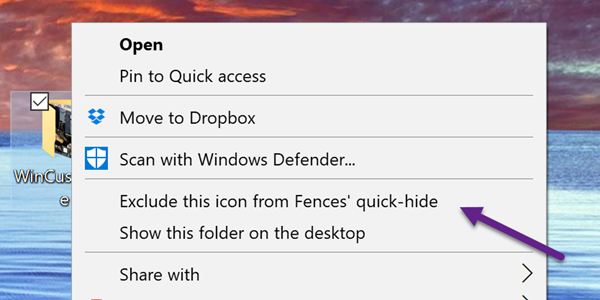
If you enjoy the quick hide feature, but wish it didn't hide everything when you double-click, we've got some good news for you. An option in the Fences program allows you to exclude certain icons, folders, and fences from quick hide! Just right click on the icon or fence, select the ‘exclude from Fences quick-hide’ in the menu, and you're all set! Now whenever you enable quick-hide, those items will remain visible.

Tip #3 – Automatically hide and show icons
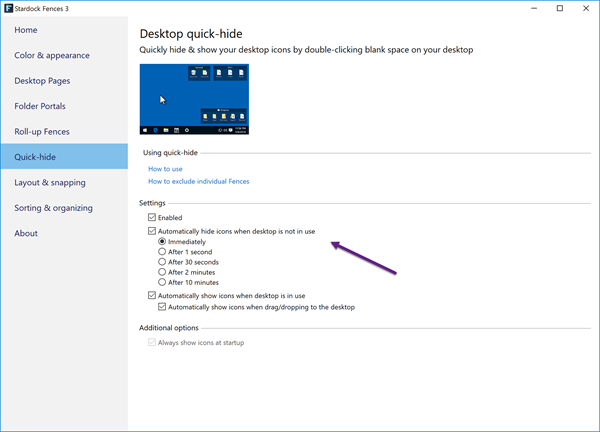
Quick hide has some additional features that you can set within the Fences configuration window. For example, you can set your desktop to automatically hide icons when it isn't in use. You can set how long the hide-delay is, or set your desktop to un-hide the icons automatically when you get back to your PC. There are lots of fantastic customization options for Fences, so be sure to explore!

Learn more about how Fences can help you organize and optimize your Windows desktop here.