The is the next article in user requested tutorials. With the new site brings some changes to the upload process, so here is a step-by-step guide on how to upload your skin submissions to WinCustomize.
Tips before uploading:
- Make sure if you have multiple skins or files, to place them in a .zip file. The .rar type files are not accepted. If you need a free .zip utility I recommend IZArc.
- Similar skins such as a slight variation in wallpapers must be bundled into one upload.
- Submissions must be completely your own work. If you are using another authors work you must include permissions in the .zip file.
- WinCustomize has a moderated gallery. Not all works will make it into the public gallery.
- Please read the Upload Guidelines for more specific rules regarding uploading.
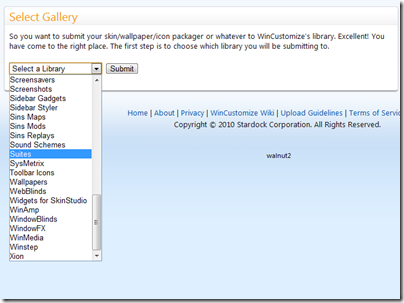
Once your upload is ready for submissions, head over to this link - https://www.wincustomize.com/explore/all/new

The drop-down menu has every available gallery on WinCustomize. Just select which gallery you want to upload, hit submit and you will be taken to the next page.
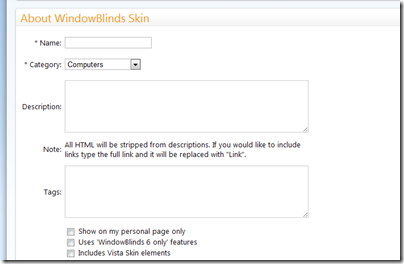
The next screen is where you will enter the information and upload the actual files. For this example I am uploading to the WindowBlinds gallery. Start by entering the name of the skin, category, description, and tags. Depending on which gallery you upload to, there might be additional options. As an example, in the WB upload window you have the option to check “includes Vista skin elements”, which will indicate the skin is ready for Vista. These options will be updated soon to reflect Windows 7.

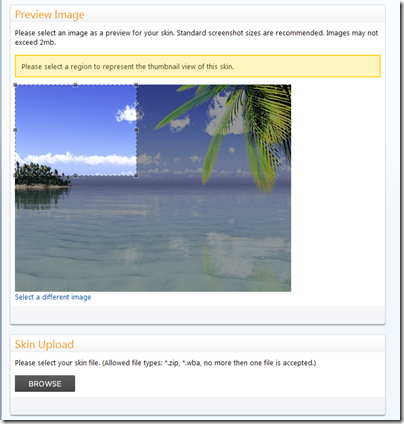
Next you will want to upload the preview image and the actual skins files. Preview sizes will vary depending on what type of skin you are uploading. More information can be found in the Upload Guidelines, but regardless the image cannot exceed 2mb and should be a .jpg file.
Just hit Browse and a dialog box will come up giving you the ability to select the files for upload. After uploading the image file, you can choose a region to represent the thumbnail view of the skin.

After the preview image is selected, you can upload your skin file. Depending on the gallery you are uploading to, .zip files will always be accepted and each gallery should accept the file extension of the skin being uploaded. After your files are selected, just read and select the confirmation and hit Submit.
Your skin will now be uploaded, and you should see a confirmation! Remember that users who are ranked below Journeyman level will have their submissions sent to moderation, which can take several days to be approved.