In the first two editions we covered the Orb, which holds most of the preferences and settings that can be altered in Impulse. This time I wanted to focus on registrations, as I have been seeing people asking questions on how to register a product through Impulse.
Download Impulse from www.impulsedriven.com .
Registrations
Accessing your registration info is done by clicking the small blue question mark in the upper right-hand corner of Impulse.
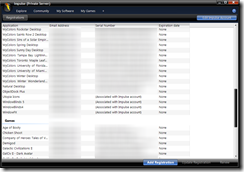
Clicking ‘register a product with Impulse’ will bring up all your current registrations in Impulse. Make note that purchases made through Impulse, and ones that are associated with your registered e-mail address should show up in Impulse. However, there might be circumstances where you need to manually enter or manage registration entries, and this is the place to do that.
In the screenshot below, you will see the current registrations, serial numbers, and expiration date (if any).

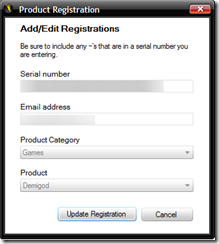
Double-clicking an entry, or by selecting it and hitting the ‘Update registration’ button, will bring up a window with more details on the registration.

Clicking ‘Add registration’ will bring up a similar window which allows you to manually enter the serial number, e-mail address, and to select the specific product you are trying to register. Once done, that product should appear in your list and will then be able to download it.
If you have an application that has subscriptions, and need to renew them, just select in the registration list, click the ‘renew’ button, and it will take you directly to the shopping cart with your upgrade ready to go.
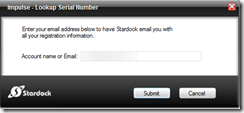
Have you forgotten your registration info? No problem. Click the blue help button again, but this time select ‘look up serial number’. Enter your e-mail address and a list of registrations will be e-mailed to you.

That covers much of the registration features in Impulse. Look out for more tips and tricks articles!