We are getting many new users, and the e-mails with people asking how to customize this, and customize that are steadily increasing. We have several guides out there, but some are a bit dated, so I wanted to start with a fresh series with the latest versions of applications used to customize your desktop look and feel.
We will cover a variety of applications, and for the most part, they will work with either Windows Vista or Windows XP unless noted otherwise. Many of the screenshots I will be showing will be based on Windows Vista, but you will get very similar results on Windows XP as well.
Some applications are free and some require a purchase to use the full versions. The best way to get the total experience is to subscribe to Object Desktop which is a suite of most of the applications I will cover in this series.
With that being said, lets start with Part 1 which will cover the beginning steps of customizing your Windows desktop.
Changing the Boot Screen
One of the first things you see when you turn on your computer is the boot screen which typically consists of the Windows logo. This is the first area we can skin using BootSkin. This is a free, stand-alone download for XP users, and Vista users can get BootSkin Pro through an Object Desktop subscription at this time. XP users should note that due to various BIOS and drivers in motherboards, BootSkin is not compatible with all systems. Windows XP boot screens are limited to 8-bit images, and Vista boots screens can have high-resolution images as the boot screen.
Changing the bootskin is as simple as just choosing which bootskin to use, and selecting apply. Next time you reboot your computer, you will have a new boot screen.

Customizing the Logon Screen
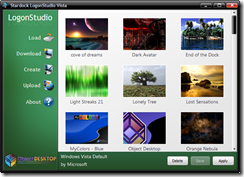
After your PC boots, the next screen most are presented with is the logon screen. This is where you are prompted to login as a particular user, and this area is just as simple to change as the boot screen was. This time we are using LogonStudio, which is a free download, and versions are available for both XP and Vista. LogonStudio Vista is also downloadable through Impulse.
You can also use LogonStudio to create your own logon screens from your own images. LogonStudio XP has an integrated editor, and LogonStudio Vista has a simple drag and drop creation feature.
Link: LogonStudio

A New Cursor
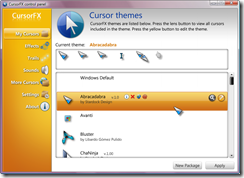
By this time you on the actual desktop, and this is where the options become much greater. Lets start with one of my favorite applications, which is CursorFX. In the past, many of you might have heard or used CursorXP, well CursorFX is the replacement for that, but CursorXP cursors will work with CursorFX. As the name implies, CursorFX is the tool you can use to change your mouse cursor to one of thousands available. Many cursors are available to download, and they range from simple cursors to ones that have some wild and detailed animations. An editor is also included allowing you to make your own cursors as well.
CursorFX Plus adds enhanced features like special effects, resizing, and recoloring of cursors, among many other features. CursorFX is free for both XP and Vista, and the Plus version is available for $19.95 which adds many additional features.

That wraps up the first part of this series, and next time we will cover changing the visual style of Windows. After you download the applications shown above, you can find thousands of skins for them at www.wincustomize.com.