Recently I wrote the WinCustomize Download Guide which gives a detailed explanation on what do with files downloaded from WinCustomize. Since we have had new galleries added, and more people wanting to submit their works, then I thought maybe a WinCustomize Upload Guide was needed. It's a pretty simple process to upload your creations to WinCustomize, but if you still are not sure then you can use this guide as a reference.
The first thing you must do is create an account at WinCustomize. Start here, then click "create new account", follow the steps to sign up and verify, then you should be all set.
Step 1: Select the Gallery
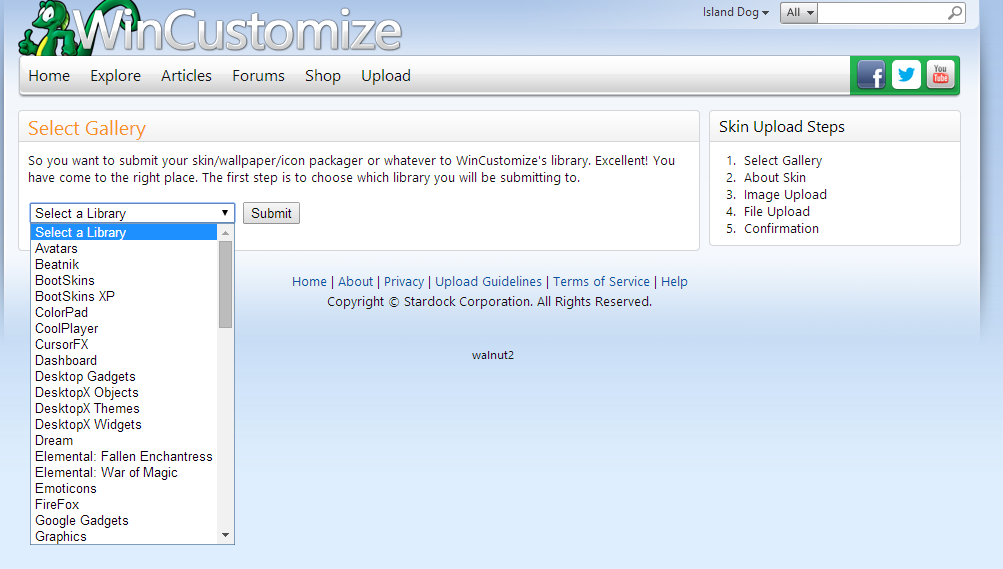
Make sure you are logged into WinCustomize with your username and password. On the front page you should see a link that says "submit to gallery", or go directly to here. Here you will make the choice of which gallery to upload to, and this all depends on what type of skin you have created. If you created a WindowBlinds skin, then obviously you would upload it to the WindowBlinds gallery, and so on. Select the appropriate gallery and hit "next".

Step 2: File Information and Upload
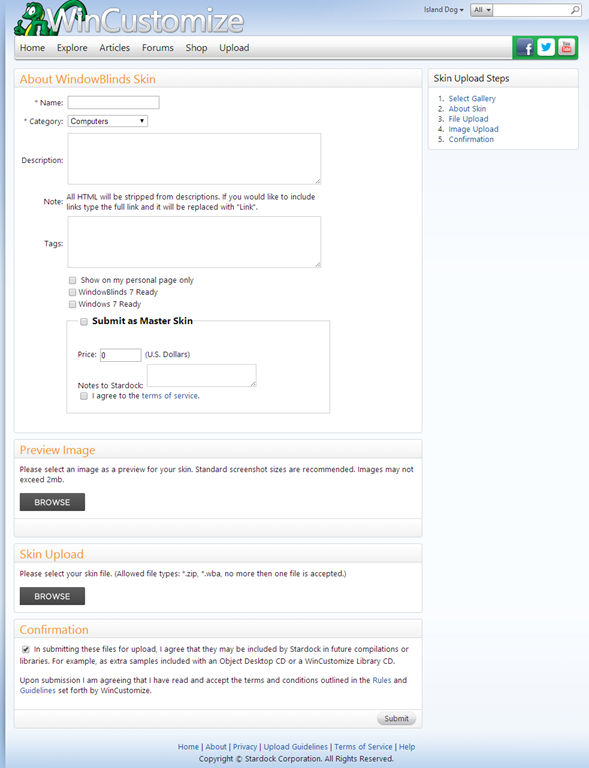
You should now be at the screen to enter your file information, and upload your file. You will need to enter the name of your submission, category, description, and your preview image and actual file to upload. Sometimes you may need to put the contents of your uploads into a .zip file. Do not use .rar, it will be rejected upon review. Also note that you have the option to upload only to your WinCustomize personal site. When this option is checked your submission will only appear in your personal site, not the public galleries. When all your information is entered and your files selected, just hit "Submit" and you are done.

Step 3: Awaiting moderation
Once uploaded your submission will enter a moderation queue until one of our moderators makes the submission public, or rejects the submission based upon something like uploading another persons work, improper files, etc. When the submission is moderated you will receive an e-mail letting you know it's available, or an e-mail notifying you of rejection. Members who have obtained the class of Journeymen or higher will have their works uploaded without moderation, with the exception of updating of current skins. For more information about access class/promotions on WinCustomize, please read this page.
Note: Members with an access level of Master or above can sell their skins on WinCustomize. More information about that is available here.
Tips:
- Before submitting please read the WinCustomize Guidelines which will explain what it takes to get your work accepted, and what is not acceptable to upload.
- When creating a preview image, make sure it's large enough for people to see what you are uploading. Sometimes people upload very small thumbnail images and it's almost impossible to see what the preview looks like. Also remember to use .jpegs for your preview.
- Preview images should be at a minimum 1024x768, and is recommended especially for uploads for Wallpapers, WindowBlinds, Dreams, etc. The bigger the preview, the more you can show off.
- Do not upload .rar files. If you must package your submission, make sure it's in a .zip file.
- Make sure that your preview image is an actual representation of what the submission looks like.
- If you are using scripts or images of another artist, be sure to include the proper permissions (if needed) with your upload. Failure to do so could result in rejection of your submission. Do not submit another persons work without permission.
- Dream submission guidelines can be found here.